A simplified guide for setting up automated Flutter app deployment to Raspberry Pi devices using AWS services.
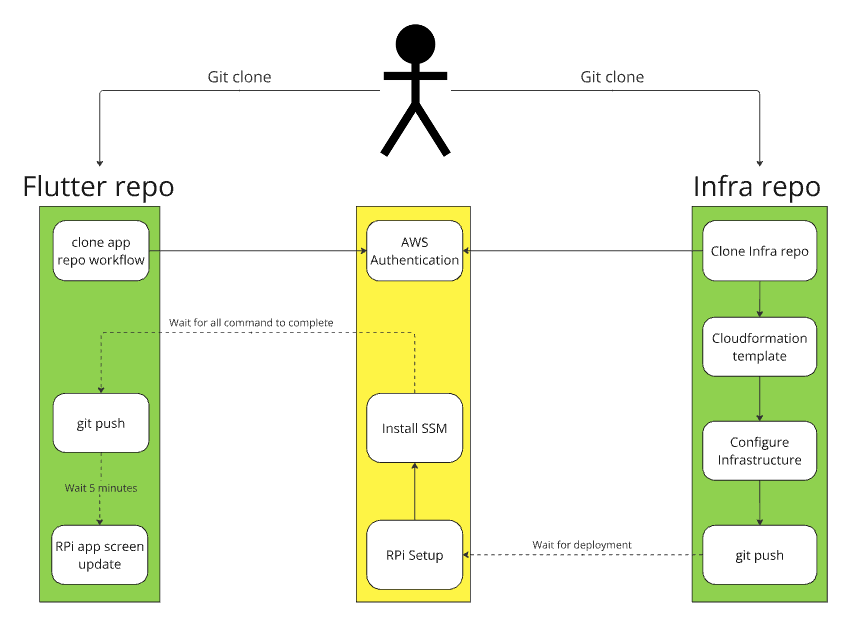
Table of Contents
Prerequisites
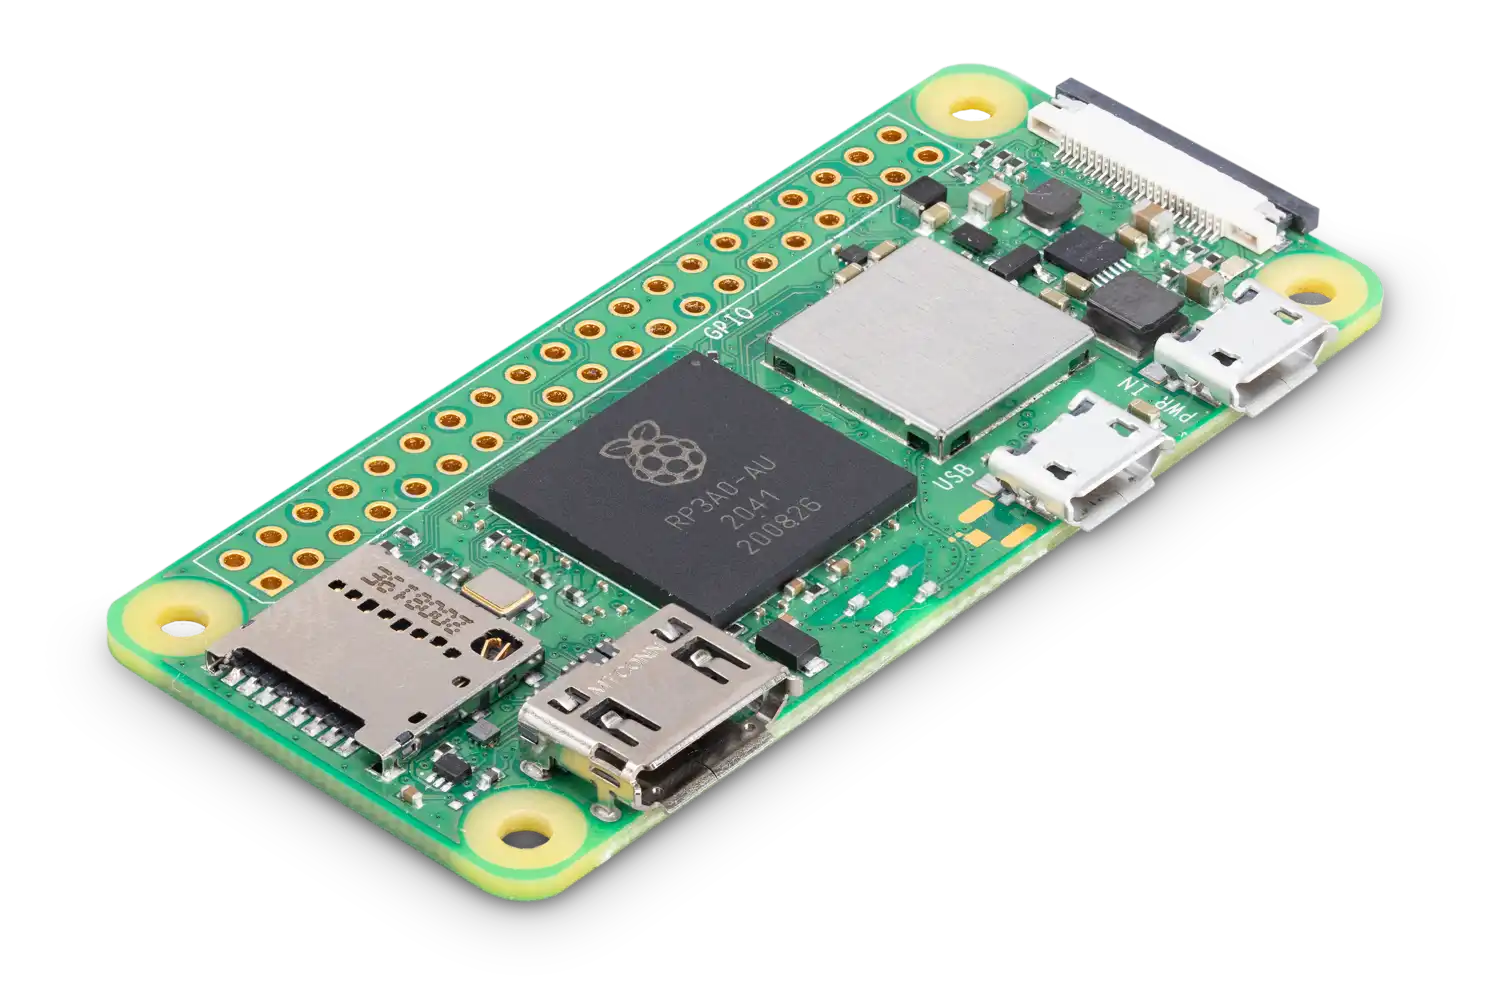
Hardware Requirements 🔧
| Component | Specification |
|---|---|
| Raspberry Pi | Zero or newer |
| Storage | MicroSD card (16GB+ recommended) |
| Power | Compatible power supply |
| Display | Raspberry Pi compatible display |
Software Requirements 💻
| Software | Version/Details |
|---|---|
| AWS Account | Active account with admin access |
| GitHub Account | Active account with repository access |
| Flutter SDK | ≥3.0.3 |
| Git | Latest version |
| AWS CLI | Installed and configured |
| Raspberry Pi OS | Lite (64-bit recommended) |

Repository Setup
-
Create Project Directory
mkdir flutter-appcd flutter-app -
Clone Infrastructure Repository
git clone https://github.com/[original-owner]/infra.git -
Repository Configuration
-
Create Repositories
- Create a new empty repository for infrastructure
- Create/use existing Flutter application repository
-
Configure Infrastructure Repository:
cd infragit remote remove origingit remote add origin https://github.com/[your-username]/infra.gitgit push -u origin main
-
-
Setup CI/CD Workflow
-
Create workflows directory in Flutter app
mkdir -p /path/to/your/flutter/app/.github/workflows -
Copy workflow configuration
cp infra/.github/workflows/flutter-build.yml /path/to/your/flutter/app/.github/workflows/
-
AWS Authentication Setup
Choose your preferred authentication method (OpenID Connect, AWS Access Keys, or AWS SSO) and configure it according to your organization’s security requirements and best practices. Make sure to:
- Set up the chosen authentication method in AWS
- Configure the necessary secrets in your GitHub repositories
- Update your workflow files to use the selected authentication method
Infrastructure Configuration and Deployment
-
Configure Infrastructure
-
Navigate to infrastructure repository
-
Update config/config.toml:
version = 0.1[default.deploy.parameters]stack_name = "your-stack-name" # Choose unique nameregion = "us-east-1" # Your AWS regioncapabilities = "CAPABILITY_IAM CAPABILITY_NAMED_IAM CAPABILITY_AUTO_EXPAND"resolve_s3 = trues3_prefix = "your-prefix" # Choose unique prefixdisable_rollback = false
-
-
Deploy Infrastructure
-
Push Changes
git add .git commit -m "Update infrastructure configuration"git push origin main -
Monitor Deployment:
- GitHub Actions progress
- CloudFormation stack creation
- CloudWatch logs
-
Verify Resources:
- CloudFormation stack complete
- S3 bucket created
- IAM roles/policies configured
- SSM documents available
-
Raspberry Pi Setup and AWS SSM Configuration
-
Initial Raspberry Pi Setup
- Download Raspberry Pi Imager from official website
- Launch Raspberry Pi Imager
- Select your device (e.g., Raspberry Pi Zero 2 W)
- Choose Raspberry Pi OS Lite (64-bit)
- Select your microSD card
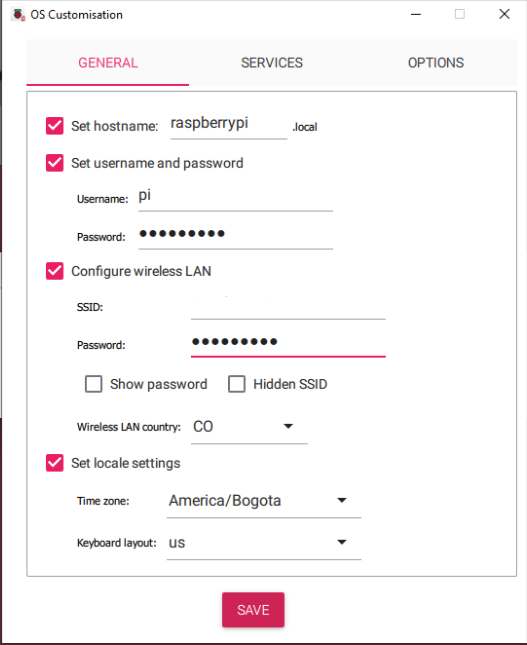
- Configure OS Settings in Raspberry Pi Imager
- Enable SSH
- Write the OS to SD card and insert it into your Raspberry Pi
-
Initial System Configuration
-
Connect to Raspberry Pi via SSH
ssh username@hostnameExample: ssh pi@raspberrypi
-
-
AWS Systems Manager Setup
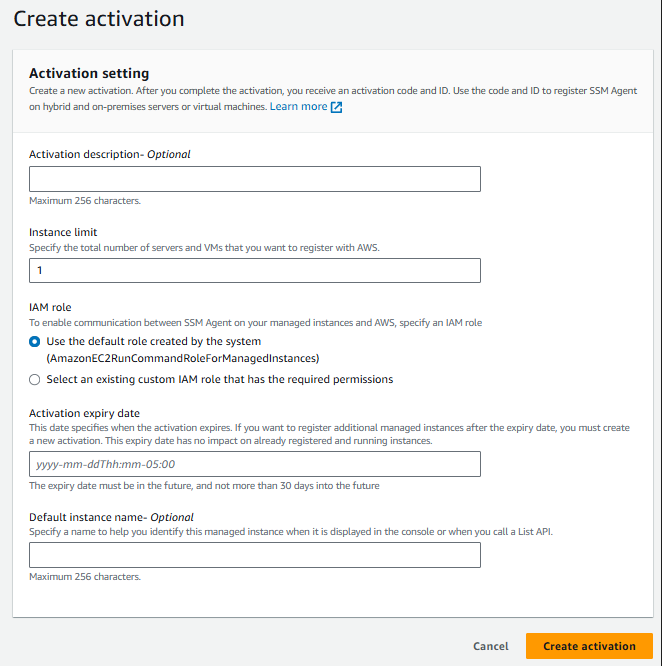
- Create Hybrid Activation:
- Go to AWS Console → Systems Manager
- Navigate to Node Management → Hybrid Activations
- Click “Create activation”
- Fill in required information
- Save the Activation Code and Activation ID
- Create Hybrid Activation:
-
Install SSM Agent on Raspberry Pi:
Set your variables
export REGION=us-east-1 # Replace with your AWS regionexport ACTIVATION_CODE=your_activation_codeexport ACTIVATION_ID=your_activation_idCreate temporary directory
mkdir /tmp/ssmDownload SSM setup CLI
curl https://amazon-ssm-${REGION}\s3.${REGION}.amazonaws.com/latest/debian_arm/ssm-setup-cli\-o /tmp/ssm/ssm-setup-cliMake it executable
sudo chmod +x /tmp/ssm/ssm-setup-cliRegister the device
sudo /tmp/ssm/ssm-setup-cli -register \-activation-code $ACTIVATION_CODE \-activation-id $ACTIVATION_ID \-region $REGION -
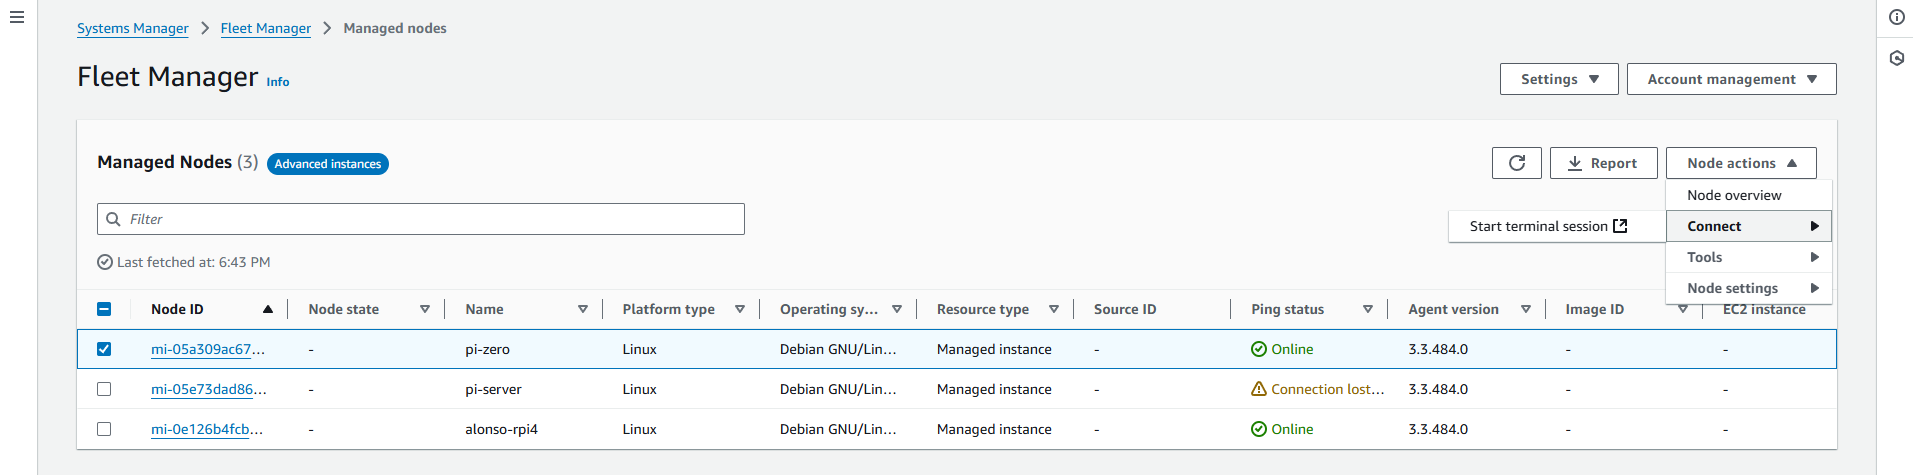
Verify Registration:
- Go to AWS Systems Manager → Fleet Manager
- Your Raspberry Pi should appear in the managed instances list
Conclusion
This simplified guide provides the essential steps to set up Flutter application deployment to Raspberry Pi devices using AWS services. The solution offers:
- Automated device management
- Secure infrastructure
- Streamlined deployment process
- Easy scalability
- Basic monitoring capabilities
- Automatic updates: Every push to your Flutter app repository triggers the workflow, automatically updating the application on all connected Raspberry Pi devices
For more advanced configurations or detailed information about specific components, refer to the complete documentation or AWS documentation.